Wednesday, June 25, 2014

Bean & Cheese Enchiladas! (EASY AND FAST)

Hi everyone!  I don't know about you but when I get home from work, I do not want to cook a darn thing.  I LOVE cooking! It is most definitely a stress relief for me.  I usually just like to whip stuff up.  I came up with this super easy recipe a couple of years ago when my husband really wanted enchiladas.  I don't claim them to be anything like authentic enchiladas (my mother in law makes the BEST) but they are easy, take about 30 minutes total and they are relatively inexpensive.  Please excuse my interesting pictures..I took them with my phone because my digital camera wasn't working but I really wanted to show this recipe step by step :).

Step 1: Gather the ingredients you will need. 
*1 package of 8 burrito size tortillas,
*2 cans of enchilada sauce (any level of spiciness, we like HOT!)
*1 can of refried beans,
*1 bag of fiesta blend/colby jack/montery jack cheese.  Essentially whatever "Mexican" cheese you like.


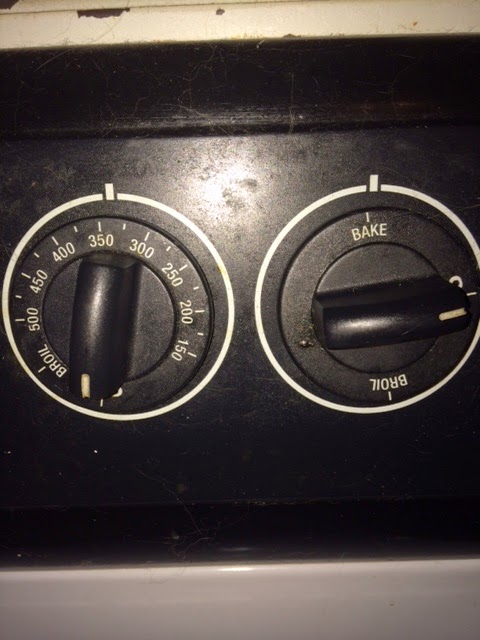
 Step 2: Preheat your oven to 350 degrees

Step 3: Prepare your pan! 
I spray a 13x9 pan with cooking spray, quite liberally I might add.

Step 4: Pour some sauce! 
I pour about 2/3 of one can of sauce into the bottom of the pan and spread it around until it covers the bottom of the pan.

Step 5: Start preparing your enchiladas
Open your can of refried beans and plop down a tortilla.  Spread a large spoonful of beans in the tortilla.

Now, take your can of sauce that has a little leftover and pour a small drizzle of sauce on top of the beans.

Next, sprinkle a small amount of cheese on top of your sauce/bean layers.


Last, roll up the tortilla and place it seam side down in your pan!

All rolled up! 

Seam side down, in pan.

Repeat until you have 8 enchiladas in your pan.

Use the rest of the sauce from your second can of enchilada sauce and pour it all over your enchiladas.

Sprinkle all of the remaining cheese in the bag on top!

Bake at 350 degrees for 20-25 minutes (I usually go for 25, I like mine a little "crispier")

Take them out of the oven and let them cool for a few minutes. They are messy, warm, cheesy, and delicious! I love to serve ours with Spanish rice! 


That's it everyone!  It's quick, easy, takes about 10 minutes of prep and 20-25 minutes of bake time and you have a delicious supper that is done quick and easy!  I will post the recipe below in a more standard format but I hope you enjoy!  Let me know if you recreate this dish for your family!

Easy Bean & Cheese Enchiladas
  • 8 Flour Tortilla's (Burrito Size)
  • 2 10 oz can's enchilada sauce
  • 1 16 oz can of refried beans
  • 1 8 oz bag of shredded cheese
Directions
  • Preheat oven to 350 degrees and prepare a 13x9 cake pan with cooking spray.
  • Spread about 2/3 of one can of enchilada sauce in the bottom of pan and spread around until it fully covers the bottom.
  • Lay a tortilla out flat and spread about a tablespoon of refried beans in the center.
  • Pour a small amount (about a tsp.) of enchilada sauce on top of the refried beans.
  • Sprinkle about a tablespoon of shredded cheese on top of beans and sauce.
  • Roll the tortilla up and place seam side down, starting on one side of the pan.
  • Repeat this with the remaining 7 tortillas.
  • Once all 8 enchiladas are placed seam side down in the pan, pour the remaining sauce over the top of them, trying to keep the sauce from covering the ends of the tortillas.
  • Sprinkle the remaining cheese over the enchiladas on top of the sauce.
  • Bake at 350 degrees for 20-25 minutes.
  • Let cool for several minutes
  • Enjoy! 


Wednesday, June 4, 2014

News Flash!

Hey guys, so before I forget, I did want to tell you that today is National Cheese Day.  I also wanted to do an update on the "national food days" posts.  I know I told everyone I would be doing it everyday..well I then realized that I would not be able to post other great stuff that I wanted to share with you! I will still do a post once in a while about the National Food Holiday..especially if I have a great recipe to share with you guys.  I just decided that this would be the better way to do things.  Thank you everyone!

Monday, June 2, 2014

National Rocky Road Ice Cream Day!

Today, June 2nd, is National Rocky Road Ice Cream Day!  I personally am a huge fan of Rocky Road! Marshmallows is one of my favorite things and of course I love chocolate :)


Rocky Road Ice Cream, is a chocolate flavored ice cream and although there are variations on this flavor it is traditionally composed of chocolate ice cream, nuts, and marshmallows. According to one source, Rocky Road was invented by William Dreyer in March of 1929 in Oakland, CA where he cut up walnuts and marshmallows with his wife's sewing scissors and added them to chocolate ice cream much like the manner that reflected his partner, Joseph Edy's chocolate candy creation involving walnuts and marshmallows.  Later, walnuts were changed to almond pieces after the great wall street crash of 1929.  Dreyer and Edy gave the current name to "give something people to smile about during the great depression".

I think Rocky Road is an ice cream enjoyed by all and I don't think there is anything better than homemade ice cream.  I have included a delicious recipe that I found for you guys to try. I think this is one of my favorite National Food Holidays! 

Rocky Road Ice Cream - From allrecipes.com

INGREDIENTS:
1 (14 ounce) can sweetened condensed
milk
1/2 cup unsweetened cocoa powder
2 cups heavy cream
1 cup light cream
1 tablespoon vanilla extract
1/2 cup chopped pecans
1 cup miniature marshmallows
DIRECTIONS:
1.In a medium saucepan over low heat, cook and stir condensed milk and cocoa until smooth and slightly thickened, 5 minutes. Remove from heat , and allow to cool slightly. Stir in heavy cream, light cream, and vanilla. Refrigerate until cold.
2.Pour mixture into the canister of an ice cream maker, and freeze according to manufacturer's directions. Stir in nuts and marshmallows halfway through the freezing process.

Sunday, June 1, 2014

National Hazelnut Cake Day


Hey guys! Today, JUNE 1st! Holy cow, I cannot believe it is ALREADY JUNE!  Anyhow, Today is National Hazelnut Cake Day, unfortunately, I could not find a whole lot of history on hazelnut cake!  I did however, find a fantastic recipe which I did test out because it said "Norwegian" and for those of you that know me in person know that I am about as Norwegian as they come! I just had to try it and it's fantastic!! I'm sorry I don't have a history lesson for you guys but I hope you try out this recipe to celebrate this food holiday!

Norwegian Hazelnut Cake

Disclaimer: I found the above picture and recipe on all recipes.com

INGREDIENTS:
3/4 cup hazelnuts
1/2 cup butter
1 1/2 cups white sugar
1 teaspoon vanilla extract
2 cups all-purpose flour
2 teaspoons baking powder
1/4 teaspoon salt
1/2 cup heavy whipping cream
1 cup semisweet chocolate chips
3 eggs
1/2 teaspoon vanilla extract
DIRECTIONS:
1.Preheat oven to 350 degrees F (175 degrees C). Lightly grease the bottom of one 10 inch springform pan.
2.Reserve 8 whole nuts for garnish. Pulse the remaining nuts in a food processor until ground, and reserve 1 tablespoon of ground nuts for garnish.
3.Melt margarine or butter in a small saucepan over low heat, cool.
4.In a large bowl beat eggs, sugar, and 1 teaspoon vanilla extract until thick and lemon colored (about 2 to 3 minutes). Add flour, baking powder, salt, and ground nuts, mix well. Continue to beat mixture while slowly adding the cooled melted butter or margarine until blended (mixture will be thick). Spread batter into prepared pan.
5.Bake at 350 degrees F (175 degrees C) for 35 to 40 minutes or until a toothpick inserted in the center comes out clean. Cool in pan for 15 minutes then remove sides of pan. Remove pan bottom and invert onto a serving plate. Cover with a cloth towel and cool for another 30 minutes before glazing.
6.To Make Glaze: In a medium saucepan bring whipping cream just to a boil, remove from heat and stir in the semi-sweet chocolate chips until melted and smooth. Stir in 1/2 teaspoon vanilla extract. Spread glaze over top of cooled cake, allowing it to run down the sides. Sprinkle reserved ground nuts around top edge and arrange whole nuts over ground nuts. Enjoy!